Tuesday, May 10, 2016

The Climber


So far, we've done a great job of coming up with some interesting, low-cost additions to our playground that focus on natural play. But we always had in mind that we would incorporate a few out-of-the-box pieces when we had the money. Our playground committee's hard work finally paid off this spring when we were finally able to purchase a brand-new climbing net. Yippee!

Climbing nets take up a surprisingly large footprint when you consider the additional eight-foot clearance required around it. The best location we could find was next to our large playground structure, but that required breaking up a section of pavement.


We know--the painted map of the U.S. is gone. We hope to repaint it in the near future, along with more four squares. Since Linkel Construction/Cosmic Stone was already on site to work on our outdoor classroom, they were kind enough to lend their heavy equipment to make the job go much easier. 


The spot is all ready for digging! 


The climbing net is anchored at five points--each corner, plus the center post. The anchors are set in concrete, which means we needed to dig the holes to a depth of about three feet, then set a plywood box into the hole, which would become the concrete mold. It's a little bit like making five, tiny house foundations.  


The first couple of holes went all right, until we hit this massive rock at a mere eighteen inches below the surface. Ledge has been the bane of our playground existence. Mr. Dedek has even considered renaming the school to "Ledgeside".  (Not really.) Once again, jackhammers had to be involved.


Thanks to the hard work and ingenuity of Linkel Construction and Rick Schultz, we were able to solve the problem.


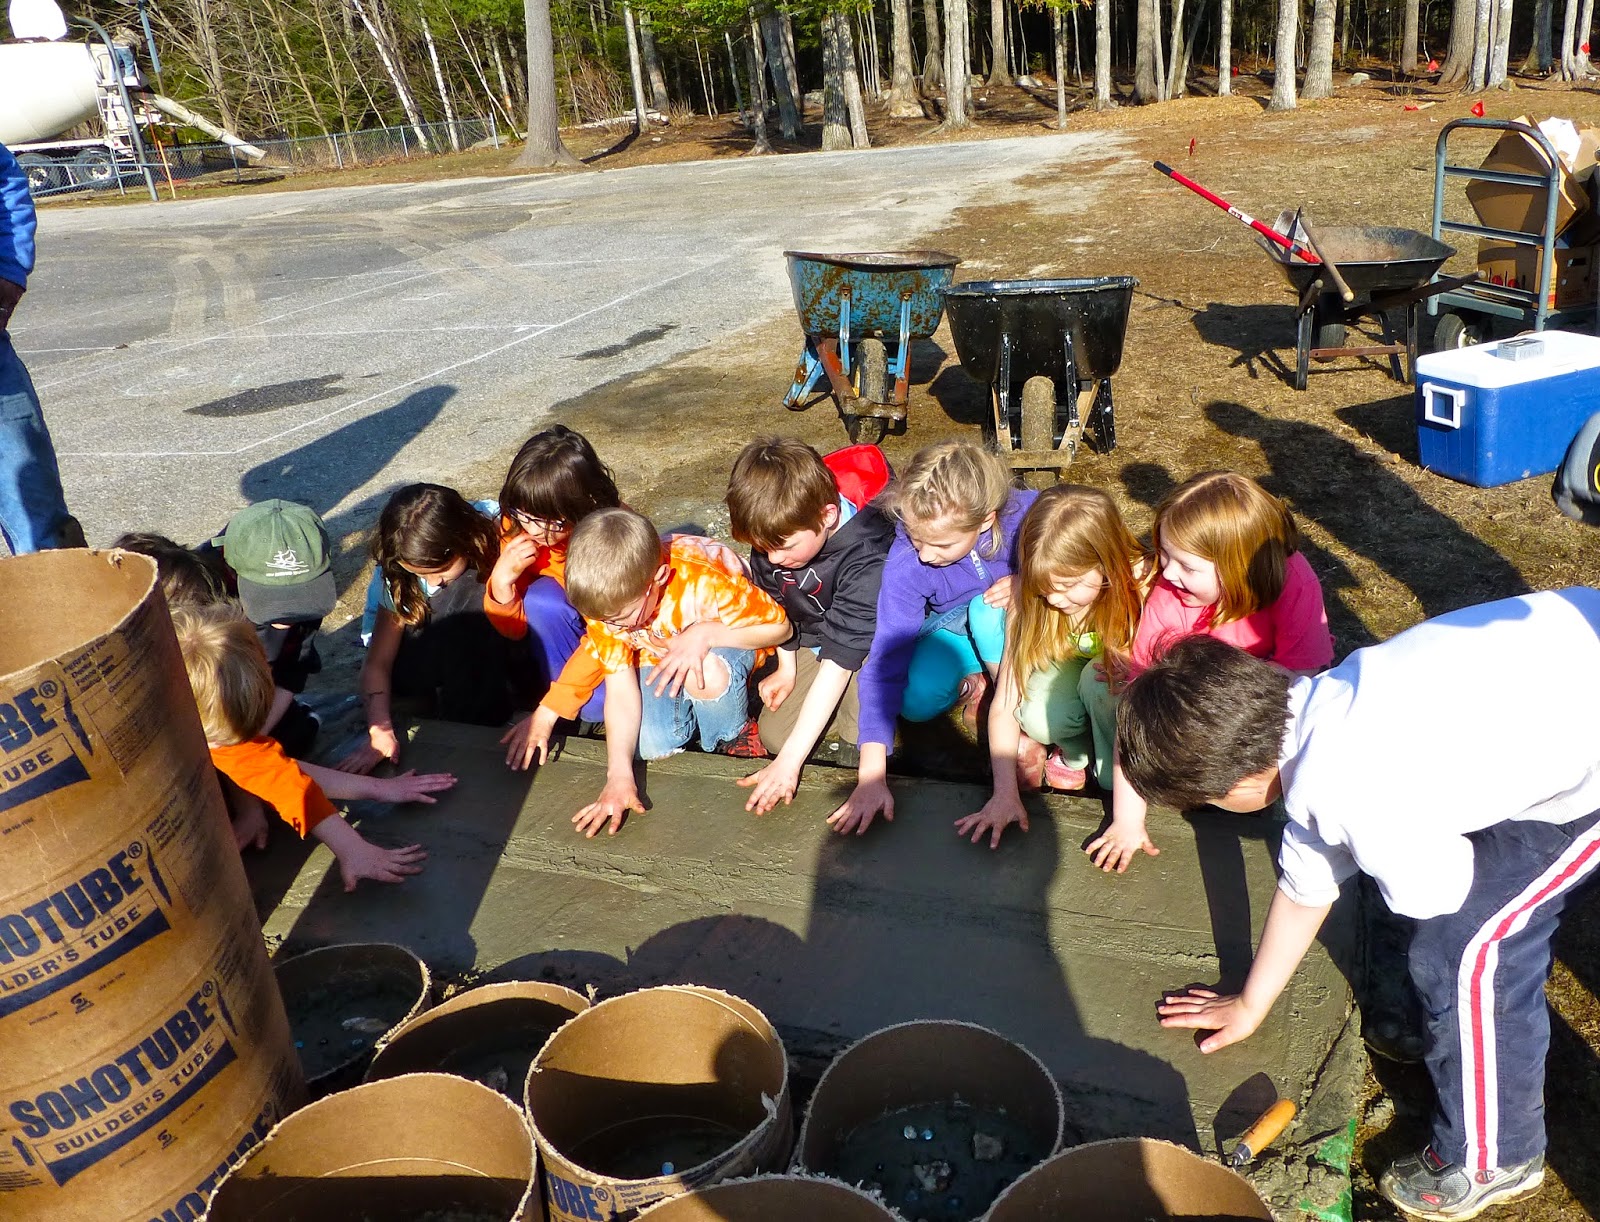
Finally, we were able to fill the molds with concrete. Once the concrete was set, the net itself went up within an hour. Once the wood chips were down and the equipment was inspected, it was ready for play! 


The kids love it! Thank you to Linkel Construction and our volunteers for all your hard work!


Monday, April 25, 2016

Outdoor Classroom


Classroom? What does an outdoor classroom have to do with a playground? Everything, really. Early on, one of the goals of the Woodside Playground Project was to provide more opportunities for students to enjoy the outdoors, and one of the best ways to do that is to incorporate more outdoor learning spaces. When our landscape designer, Sashie Meisner, toured our campus, she zeroed in on this space behind the art room: 


Many administrative offices and classrooms look out at this rather uninspiring courtyard. It seemed ripe to put to good use. Many schools in recent years have outdoor amphitheaters and we loved the idea, but there was one problem--ledge. As you can see on the right side of the picture, there's no way we'd be able to remove it. So, what do you do with a problem you can't move? You work with it!


We knew we were going to need some expert advice, so we enlisted the help of Woodside parents Lance and Donna Linkel of Cosmic Stone to help. They had many great ideas to help us expand seating and beautify the area while keeping it within our limited budget. 


The great news was the ledge already had enough room to seat about twelve students comfortably. What we needed was to provide enough seating for another dozen students and a teacher. The Playground Committee took a field trip to Cosmic Stone and selected these flat pieces which could be made into simple benches. 


Heavy stones require heavy equipment to move them! 


Two other concerns with the project were drainage and making the outdoor classroom ADA compliant. This pathway was built to solve both of those issues. The path is covered in pea stone, which is fine enough for a wheelchair navigation. This curving garden border adds visual interest. Cosmic stone planted a few simple low-maintenance shrubs. We hope to fill out the border in the future with plant donations. 


The ledge area can get hot and sunny during part of the day, so we added a Japanese maple to provide some shade. A few pines were added. As they grow, they will provide sound and wind protection and beautify the view both inside and out. 


A few locally harvested stones were added to beautify the area. Our hope is that they will inspire students working in the art room and give our students an appreciation for Maine's geologic treasures. 


Our outdoor classroom has already been enjoyed by several classes already. Here's to Woodside students spending more time in nature!  Thank you Donna, Lance, Matt, and everyone at Cosmic Stone--you did a beautiful job! Woodside will enjoy this learning area for decades to come. 


Saturday, January 9, 2016

The Tree Fort


Of all the projects so far, this one was the most fraught with delay--but it's finally here! Part of the difficulty was that we were making the fort from scratch and it had to conform to strict playground building codes. The entire structure was designed and built by our very own Woodside parent, Rick Schultz. This homemade fort saved us thousands of dollars compared to an out-of-the-box piece of equipment and the workmanship can't be beat. It's going to last a very long time.


Thanks to a mild fall and early winter, we were able to dig the holes for the posts with little trouble. Temporary boards were put in place to help us square up the posts, then we back-filled the holes. We chose to build around a tree at the edge of the woods but near the slide, which seemed to follow the natural flow of play. 

Rick chose white cedar for the project, which will not only last a long time but also has a fantastic smell. Over the course of several weeks, he built the frame at his home in a modular fashion so that on-site assembly would be quick. And it was! The pieces fit together perfectly, like a  jigsaw puzzle. 


Here are the two halves of the platform arriving on a trailer.


The platform pieces were carefully laid on top of the posts and support beams.


Then they were joined together. 


The end pieces were put in place. 


Then the sides. Have you noticed the interesting shape? Instead of the usual rectangle you'll find on most tree forts, this one echoes the shape of a boat. The plywood was only on the sides as a temporary measure for support and safety until the rope panels were put in place. 


Mr. Dedek was on hand for the build, helping us rake the enormous pile of wood chips beneath the structure.


Next came the stairs, which were required instead of a conventional ladder. Although we don't have one now, at some point in the future we'd like to add a ramp on the back of the structure.


Rick Schultz made these beautiful handrails by routing a few boards. They have been sanded to a smooth finish. No splinters here!


After the plywood was removed, the rope panels were inserted. Commercial fishing rope was threaded through eye-bolts and hand-tied by playground volunteers. This was a very cost-effective way to create small enough openings to pass code. The rope panels also allow for visibility and fit in well with our boat theme. 


The final step was to lay down the decking and the top rails. 


Here's the finished masterpiece! A huge thank-you to Rick Schultz for the countless hours of work and care he put into this project and to all the volunteers who worked many hours in the cold. The kids are going to love it!

Sunday, August 31, 2014

The Hill Slide


It was an exciting day this summer when we finally broke ground on the hill slide--the second major project in our playground plan. Ever since we'd opened up the forest area for play we'd noticed the children were wearing a path up the steepest part of the hill. It seemed like the perfect place for a slide. 

The playground committee spent months researching slides. We looked at various materials, fabrication methods, and pre-made equipment. The slope is 23 feet long--much longer than the average available slide--which made our search even more difficult. Finding a suitable slide was going to be expensive. 

Then we met with Bob Walton of Ray Labbe and Sons Construction. Right from the start, his team brought a lot of creativity and enthusiasm to the project. We asked Bob if he had a solution to our problem and sure enough, he did: double-walled drainage pipe. The best part was that this option was tremendously durable and only a fraction of the cost of the other slide options. 


The drainage pipe was cut in half lengthwise. Unfortunately, the cut edges of the pipe are too rough for safe play and need to be covered.  Bob and his team came up with an ingenious solution--firehose! The hose was tacked onto the rough edges and provide a strong, durable covering. 


A steep, fast slide calls for a soft landing. A frame filled with wood chips fits the bill.


Another important feature of the hill slide was the path up the hill. We wanted the path to be both accessible to special needs students and to lend itself to imaginative play. Sashie Misner, our landscape architect, incorporated a half-circle of boulders into the design. Ray Labbe and Sons had the perfect boulders and graciously donated them to our project. 


In the future, we hope to enhance this area with sturdy plantings to help keep students from veering off the path and to prevent erosion.


So far, our slide has garnered rave reviews among the students and even a few adventurous parents. A huge thank you to Bob and everyone at Ray Labbe and Sons! We love our new slide!


Sunday, May 4, 2014

Breaking Ground


At long last, we have finally broken ground on our playground! Over April vacation, Woodside was the scene of much activity. The first goal: installing our new swing set. Although the process is fairly simple, it's not exactly easy. 


The first step was to measure and stake out the area where the swing set would go. We chose a relatively flat area parallel to the current swing set. 


Once we marked where the swing set poles were supposed to go, we used a power auger to dig the holes. 


We hit a few rocks along the way that had to be dug out by hand. On the last two holes, we hit ledge. We rented a special tool to drill a hole into the ledge, then put rebar into the hole. The ledge became an anchor. 


Our Woodside student helpers were awesome! They moved equipment, used power tools, shoveled dirt, and filled holes with cement. They were an eager crew. Here, they are moving cardboard tubing that would serve as concrete molds.


We cut the tubing to fit the holes. 


Next came assembly. The poles were placing within the tubing. We made adjustments to make the frame straight and level.


Pieces of wood were used to keep the poles in place.


Meanwhile, extra tubing was cut into smaller pieces and scrap wood was used to make a frame. Just wait until you see what we ended up doing with these!


After lunch, the cement truck arrived. 


Working quickly, we filled wheelbarrows with cement and poured the cement into the holes. Everyone grabbed a shovel and worked the cement down in between the gaps in the wooden braces to fill the holes. 


Remember that wooden frame and the cut-up pieces of tubing? We filled those with leftover cement. The kids pressed their hands into the cement in the frame to make a nice memento of the day. In the tubes, we pressed rocks and glass beads into the cement. What for, you ask? Wait for it....


Almost a week later, when the cement was fully hardened, we cleaned up the extra cement around the poles and removed the braces. We spread out wood chips and attached the hardware.


A few helpers came along and gave the swings a try. They were given an enthusiastic thumbs up (by a few adults, too!). 


The finished product!


Remember those round molds? We peeled off the cardboard and were left with beautiful, homemade.....


Stepping stones! They are in the forest area. They make a curved path and encircle a tree. These also received high praise from our student testers. 

There was one more project that was completed during April vacation, but it deserves a blogpost all its own. Stay tuned.

A huge thank you to all our students, parents, and staff members who helped build the swing set. It was truly a wonderful day filled with Woodside community spirit and one that everyone who participated will remember for a long time.